Quick Answer
Pencil grip for kids develops through comfortable drawing, purposeful practice, and playful hand activities. Model a relaxed hold, offer suitable tools, and support the child’s feet and paper. Judge a grip by comfort, control, and useful writing rather than appearance alone. Persistent pain, marked fatigue, or lost skills needs professional advice.
Quick Picks
- Starting out: draw roads and pictures with an easy-to-hold crayon.
- Paper keeps moving: practice using the other hand as a paper helper.
- Writing feels hard: compare one tool or seating change at a time.
- Comfortable, readable writing: avoid changing an established grip just for its shape.
A child can love drawing yet struggle to guide a pencil through a small shape. Another may hold a pencil unusually and write comfortably. These situations need different responses. The aim is useful hand control without turning every picture into a finger-position test.
What a useful pencil grip for kids looks like
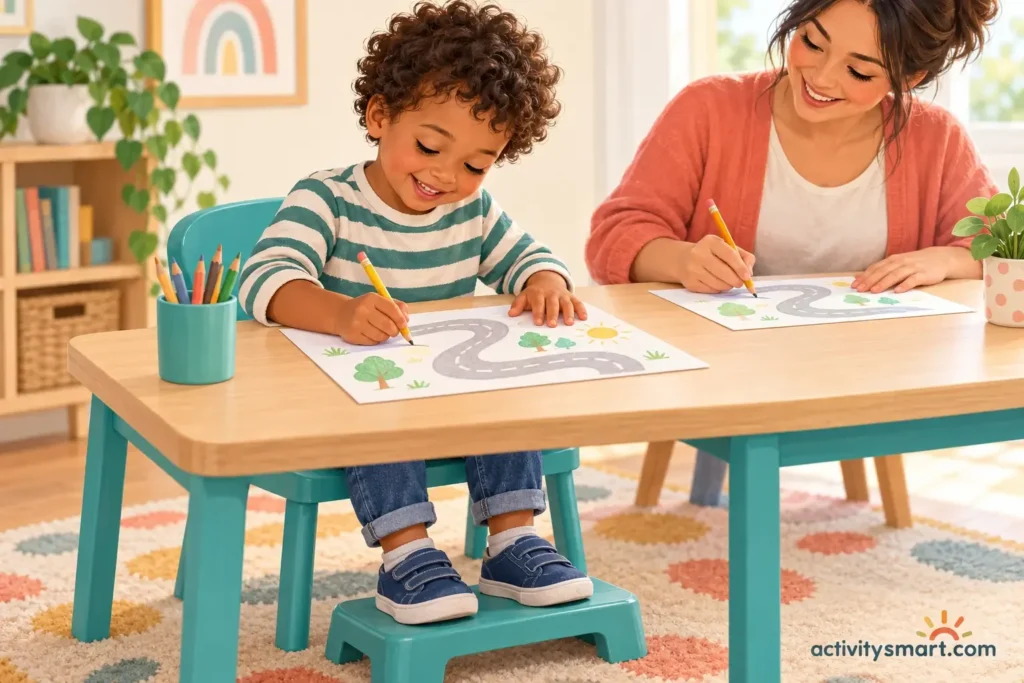
Watch a brief, familiar activity before offering corrections. Can the child see the tip, guide the marks, and finish a manageable task without discomfort? For an early writer, the task might be drawing a path. For an older child, it might be writing a short classroom answer.
A dynamic tripod is a familiar option: the thumb and index finger guide the pencil while the middle finger supports it. However, a fourth finger or a different thumb position does not automatically make a grip ineffective.
A 2012 study by Schwellnus and colleagues examined 120 typically developing fourth graders. Mature grasp patterns were not significantly associated with writing speed or legibility in that sample. This supports accepting workable alternatives; it does not establish that every grip suits every child or that preschoolers never need guidance.
Use three practical questions: Is it comfortable? Can the child control the tool? Does the result serve the task? A grip that passes these checks may need less attention than letter formation, paper movement, or an assignment that is too demanding.
Use age as context, not a grip deadline
Preschoolers are still exploring tools and marks. Avoid demanding an adult-looking hold throughout every drawing. The CDC’s four-year milestone checklist includes using fingers and thumb rather than a fist to hold a drawing tool. It does not require a named tripod pattern or fluent handwriting. Milestone checklists support discussion; they do not diagnose a child.
The following suggestions organize practice by current participation, not by a rigid developmental sequence. A child can use an easier version at any age. Disability, experience, fatigue, and task demands can all change what support is useful.
| Approximate age | Useful starting activity | What to notice |
|---|---|---|
| 3–4 years | Large pictures, dough play, broad paths | Interest, comfortable tool use, willingness to explore |
| 4–6 years | Simple shapes, short labels, familiar name letters | Paper support, visible tip, manageable effort |
| 6–8 years | Brief meaningful writing with a clear model | Readable formation, pressure, comfort during school tasks |
| 8–10 years | Real classroom writing with targeted adjustments | Participation, fatigue, pace, usefulness of adaptations |
If a child cannot yet manage a small worksheet, enlarge the task rather than repeatedly demanding more care. For broader play choices, explore our fine motor activities for children. Choose one inviting activity instead of creating a long remedial timetable.
Set up the body, paper, and tool first
Make the workspace comfortable
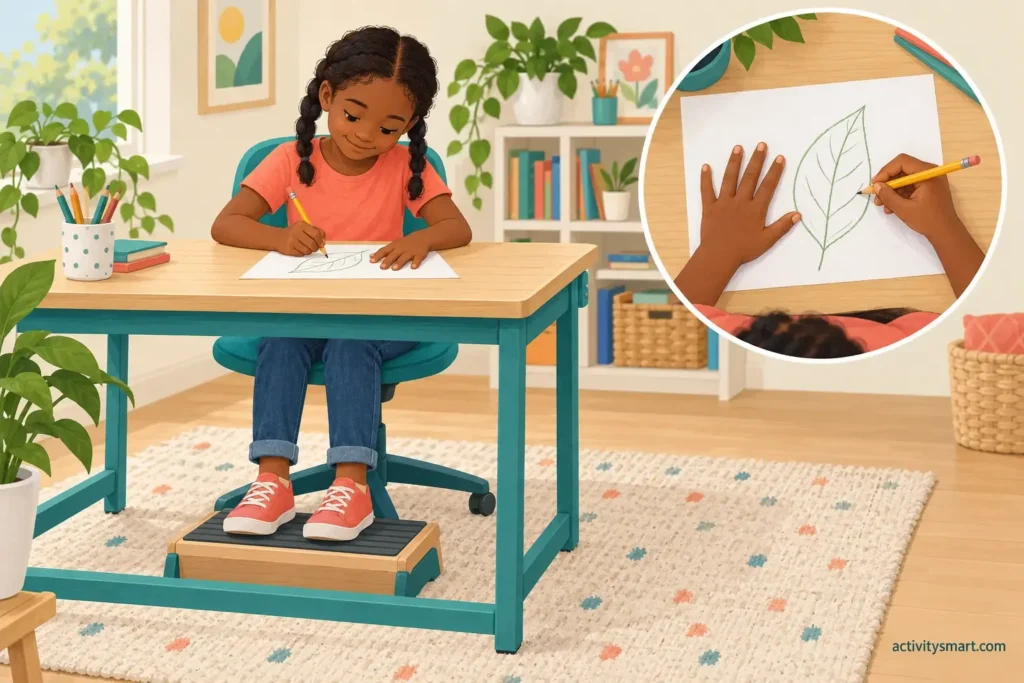
Before changing fingers, check the surroundings. Can the child reach the table without lifting the shoulders? Are the feet supported? Is there room for both forearms? A stable footrest can help when a chair leaves the feet dangling; it must not slide or tip.
Start with the paper within easy reach and let the child adjust it. Demonstrate resting the nonwriting hand on the page. Ireland’s HSE handwriting guidance emphasizes comfort and support, recognizes alternative functional grasps, and suggests trying different paper and tool arrangements.
Make one change, then repeat the same small drawing. Ask whether it felt easier. Moving the chair, changing the pencil, and correcting the wrist simultaneously makes it difficult to tell which adjustment helped. A comfortable arrangement should support participation rather than demand motionless sitting.
Offer a simple model without constant correction
For a child who needs a starting model, show a gentle thumb-and-index hold with the pencil resting on the middle finger. Say, “Hold it softly enough to move.” Draw a small curve yourself, then let the child try. Describe the movement instead of repeatedly announcing that the grip is wrong.
A visual reminder can be less intrusive than repeated verbal prompts. For example, place a small drawn dot on the pencil where the thumb can rest. Offer it as a helpful cue, not a rule that earns or loses praise. Never force fingers into position or restrain them.
Playful activities that lead into pencil control
The activities below are adaptable editorial examples, not a tested treatment program. Hand play offers opportunities to explore movement; it does not guarantee better handwriting. Include actual drawing or writing so the child can practice the task they want to use. Choose two options and leave the rest for another day.
Dough bakery followed by a picture menu
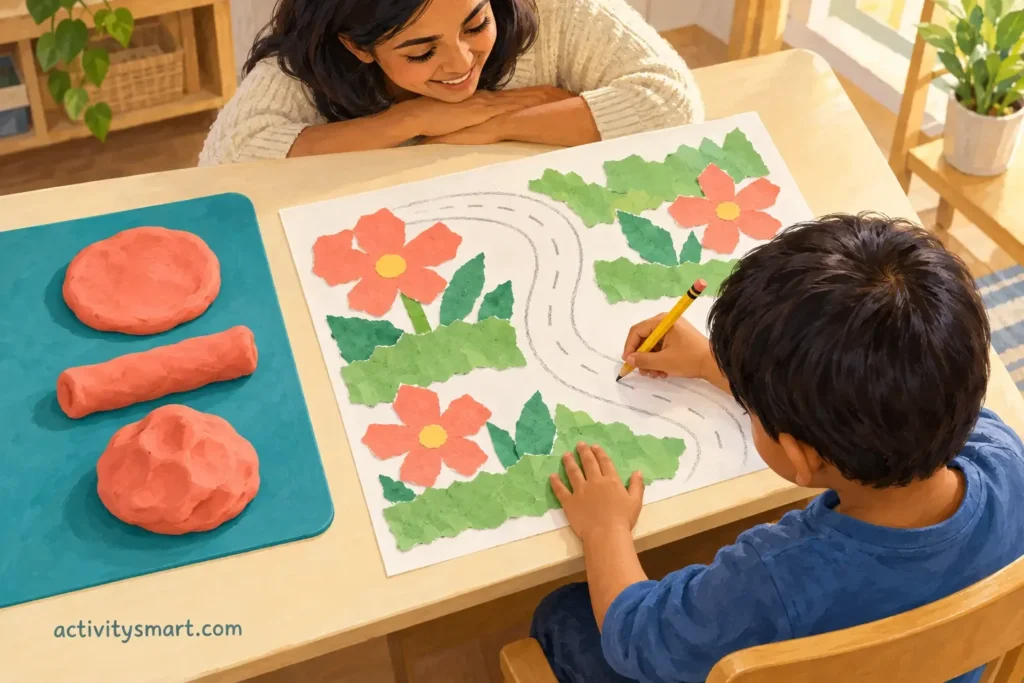
Offer age-appropriate, nontoxic dough on a washable surface. Invite the child to flatten a large pancake, pinch an edge, and roll a short sausage. Let them invent the food rather than copying a precise model. Keep the dough soft enough to manipulate without strain.
Then draw one item for a pretend menu. A preschooler might make a round bun; an older child might add its name. This creates a clear transition from hand play to purposeful marks. Check ingredients for allergies, keep dough out of mouths, and stop if the material irritates the skin.
Paper garden with tear-and-draw details
Tear broad strips of paper for grass and larger pieces for flowers. One hand holds the sheet while the other pulls. If starting a tear is difficult, an adult can make a small starter tear. There is no need to make every strip equal.
Arrange the pieces on a page, then add stems or winding paths with a pencil. Use child-appropriate glue if attaching them. Ask the child to stabilize the page while drawing between the shapes. The aim is coordinating a meaningful project, not producing a flawless craft sample.
Sticker destinations and winding roads
Put a few large stickers far apart on a sheet. Invite the child to connect them with roads. Begin with wide spaces and short distances; make the route more complex only when the child wants a challenge. A large drawn circle can replace a sticker entirely.
For an early learner, demonstrate one gentle curve. For an older child, add a bridge or a road sign. If the paper keeps sliding, pause to recruit the helper hand. Avoid racing: speed changes the task and may distract from controlled movement.
Wall drawing with a supported surface
Secure a large sheet to an easel or another suitable vertical surface. Draw rain, tree trunks, or a large imaginary playground. Keep the work within comfortable reach and secure the equipment. A child should not climb furniture or stretch overhead to complete the picture.
After a few enjoyable marks, try the same shape on paper at the table. Compare comfort without declaring one posture universally best. HSE identifies vertical or slanted surfaces as options worth trying; the child’s response determines whether this arrangement is useful.
Light-and-dark weather pictures
Draw a pale cloud and a darker storm cloud using the same pencil. Invite the child to experiment with lighter and darker marks on spare paper. Say, “Can we make a line we can see without digging into the page?” Keep the experiment playful.
If pressing hard causes discomfort, stop rather than asking for more repetitions. Compare an easier-writing tool on another occasion. Pressure is something to observe alongside comfort and control, not proof of laziness or a condition that can be diagnosed from a drawing.
Color a small area with a clear purpose
Choose one part of a picture, such as an owl’s wing, rather than requiring an entire page. Our bold-outline owl picture can provide a starting image. The child can add feathers or patterns instead of filling every area solidly.
Alternatively, use the smiling jellyfish picture to inspire curved tentacle lines on separate paper. These are creative practice choices, not assessments. If the printed detail feels too small, draw a larger version of one shape yourself.
Choose pencils and grips by what changes for the child
Buying a grip is optional. First compare two ordinary, age-appropriate tools on the same small task. Ask which is easier to move and which leaves a clear mark. Keep the preferred option available instead of assuming a triangular barrel or thick pencil must suit everyone.
Children and Family Health Devon’s pencil-grip advice recommends considering changes when a hold affects readability, pace, soreness, or tiredness. Its suggestions include modeling, visual reminders, and trials of different writing tools. A product is useful only if it helps the actual difficulty.
| Option | Possible reason to try | Tradeoff or check |
|---|---|---|
| Standard pencil | Provides a familiar starting comparison | Check whether marks require uncomfortable effort |
| Triangular or wider barrel | Offers a different holding surface | May feel awkward to a particular child |
| Shorter drawing tool | Changes how the hand can hold it | Avoid small detachable pieces for children who mouth objects |
| Removable grip | Offers finger-position cues or cushioning | Check fit, handedness, comfort, and small-part risk |
| Easel or slanted board | Changes the working angle | Secure it and compare comfort with the usual surface |
Trial a new grip during a low-pressure drawing, not during a timed school assignment. Keep a familiar tool nearby. If the child spends all their attention locating finger holes, the device may be adding complexity rather than making writing easier.
Support left-handed children and different learning needs
Let the child use their preferred hand; do not switch them to match a demonstration. Sit where they can see your model without twisting. Leave enough elbow room, especially beside a child writing with the opposite hand. Check the page from the child’s viewpoint.
Try placing and tilting the paper so the writing remains visible without an uncomfortable wrist position. Let the child experiment within a supported workspace. A pencil grip that has separate left- and right-hand instructions must be fitted accordingly; a photograph of a right-handed example is not enough.
For a child who dislikes sticky materials, replace dough with paper construction or drawing. For a child who needs a larger target, enlarge the path and reduce the number of marks. Offer a choice between two manageable activities rather than making sensory discomfort the price of participation.
When writing is an access barrier, separate the learning goal from the recording method. An adult can write down an oral answer while the child practices a small writing target separately. Coordinate adaptations with the teacher and any treating therapist so support remains consistent.
Build a short routine that includes real drawing
Use a flexible sequence: choose, play, draw, stop. As a practical starting example, offer a brief hand activity followed by a few minutes of meaningful pencil work. This is not a prescribed therapy dose. Finish earlier if the child becomes uncomfortable or loses interest.
- Choose: offer two activities and ask what the child wants to make.
- Play: tear paper, manipulate dough, or arrange large stickers.
- Draw: add a road, shape, label, or message to the project.
- Check: ask what felt comfortable and select one thing to try next time.
For a beginner, our tracing lines worksheets can supply a brief path activity. Select a manageable portion rather than assigning the full set. Trace once, then invite a similar freehand path so the exercise includes planning a movement independently.
When the child is ready for meaningful letters, use our guide to teaching name writing. Our alphabet worksheets offer another source of letter models. Pick a relevant letter instead of making completion of the alphabet the goal.
For a classroom, prepare the same project with different recording choices: a large drawing area, a label space, and a short sentence option. Children can work toward a shared topic while practicing at different levels. An older learner need not use preschool-themed materials to receive easier motor demands.
Notice progress without creating a daily grip test
Choose one observable goal for the next few sessions. Examples include holding the page during a drawing, making a short label comfortably, or finishing a small task without repeated tool changes. Avoid goals such as “perfect grip all day,” which say little about participation.
Save an occasional sample from a comparable task. Note the tool, approximate task length, and the child’s own comfort report. Compare like with like: a free drawing and a copied paragraph place different demands on a learner. Do not score a tired child’s work against a relaxed weekend picture.
If a tool change seems helpful, share a simple description with school: “The wider pencil felt easier during a short label.” This communicates an observation rather than a diagnosis. Ask whether the same adjustment helps during ordinary classroom work before buying multiple specialized products.

Common mistakes and safety limits
Correcting every mark: repeated interruptions can replace the child’s purpose with adult monitoring. Give one short cue when needed, then let the child use it. Praise a useful action, such as steadying the page, rather than comparing fingers with another child’s hand.
Replacing drawing with strengthening games: enjoyable hand play can accompany practice, but a child also needs opportunities to guide the actual tool. Berkshire Healthcare’s hand-skills guidance includes dough, tearing, and sticker activities among its suggestions. Those suggestions do not establish that any particular craft corrects handwriting.
Using unsafe props: avoid loose beads, coins, tiny erasers, and broken crayon pieces when a child mouths objects or younger children can reach the activity. Supervise materials and follow age labels. Never tie fingers together, tape a pencil to a hand, or use painful restraint to maintain a position.
Pushing through pain: stop the task if writing hurts. Persistent soreness, substantial fatigue, frequent avoidance linked to difficulty, or trouble with other everyday hand tasks warrants discussion with the child’s teacher and pediatrician or a qualified occupational therapist. Seek prompt medical advice for sudden weakness, loss of skills, swelling, or injury.
Final verdict: prioritize useful, comfortable control
Start with an inviting drawing task, a supported workspace, and a tool the child can manage. Offer a gentle model when needed, then watch comfort and function. Keep playful hand activities alongside meaningful marks. A successful adjustment helps the child participate; it does not merely make their fingers resemble a diagram.
Frequently asked questions
What is the best pencil grip for kids?
The best grip is one that lets a child control the tool and write or draw comfortably for the task. A tripod is a useful model, but comfortable, effective alternatives do not automatically need changing.
Does a four-year-old need a perfect tripod grip?
No, a four-year-old does not need a perfect named tripod grip. The CDC milestone refers to using fingers and thumb rather than a fist; discuss concerns in the context of the child’s wider development.
Should I change a four-finger pencil grip?
A four-finger grip does not need changing solely because it uses an extra finger. Consider support if the child has pain, tiring, poor control, or writing that does not meet their practical needs.
Can playdough alone improve handwriting?
Playdough alone cannot be assumed to improve handwriting. It provides hand-play opportunities, but children also need drawing and writing practice to learn how to guide a tool.
Are pencil grips necessary for every child?
No, removable pencil grips are not necessary for every child. Trial one only for a clear purpose and keep it if it improves comfort or useful control without adding difficulty.
How long should pencil practice last?
Pencil practice should last only as long as the child can participate comfortably and purposefully. Begin with a brief activity, allow breaks, and stop before discomfort; there is no single session length that fits every learner.
Should a left-handed child switch to the right hand?
No, a left-handed child should not be made to switch hands for handwriting practice. Offer space, a visible model, and paper positioning that suits their preferred hand.
What should I do if writing hurts my child’s hand?
Stop the writing task if it hurts and seek professional advice if pain persists or returns. Review seating, tools, and workload with school while arranging appropriate health or occupational therapy support.
When should I ask an occupational therapist about pencil grip?
Ask about occupational therapy support when persistent hand-control difficulties interfere with writing or other daily activities. A teacher or pediatrician can help identify the appropriate local route; an unusual-looking grip alone is not a diagnosis.
Sources and further reading
The linked CDC checklist provides developmental context. HSE and the two NHS resources provide practical support ideas. The cited Schwellnus study addresses mature grasp patterns in fourth graders; it should not be read as a preschool intervention trial. Activity examples here are adaptable suggestions, and individual assessment may identify different needs.